My companion for this tour was Wilson’s Creek, Pea Ridge & Prairie Grove: A Battlefield Guide with a Section on Wire Road (2006) by Earl J. Hess, Richard W. Hatcher III, William Garrett Piston, and William L. Shea. This guidebook has served me well on visits to Wilson’s Creek and Prairie Grove; it is well organized with clear maps. In case you haven’t read it yet, I highly recommend Pea Ridge: Civil War Campaign in the West (1992) by William L. Shea and Earl J. Hess. This is an outstanding campaign history!
The battle of Pea Ridge was basically a two-part fight with action occurring near Leetown on March 7, 1862 as well as fighting near Elkhorn Tavern on March 7th and 8th. What follows are a handful of photographs of the Leetown battlefield with brief commentary.
This first photograph looks west along a fence bordering the south edge of Oberson’s Field. The view depicts the area occupied by the 22nd Indiana Infantry until they moved toward Morgan’s Woods.

Next a view looking north from the position of Captain Martin Welfley’s Independent Missouri Battery (Union). The 2nd Arkansas Mounted Rifles were positioned in the treeline in the distance. Skirmishers from the 36th Illinois Infantry killed Confederate Brigadier General Benjamin McCulloch along the treeline shown on the far left of this photograph; Brigadier General James M. McIntosh met his demise along the treeline at about the 11:00 position in the photograph.

A view of Morgan’s Woods where the 3rd Louisiana Infantry and the 4th, 14th, and 15th Arkansas Infantry clashed with the 18th Indiana, the 22nd Indiana, the 37th Illinois, and the 59th Illinois. Fighting was difficult in such a tangled wood.


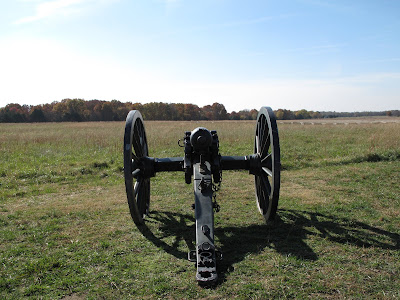
The cannon marks the position of Captain John J. Good’s Texas Battery. Oberson’s Field is over the treeline. Before Good’s battery took position, a brief clash took place nearby at Foster’s Farm. The events there were perhaps the most controversial of the battle with allegations that Cherokee Indians had scalped Union soldiers.
No comments:
Post a Comment